


The Perfect Winged Liner
A step by step guide
March 27, 2019

Hello City Babes,
Welcome back to the City Color Blog. Today we want to begin by telling you all, Happy International Women's Month! Although the specific day was March 8, as a woman owned business you know we will be celebrating all month! Take some time to celebrate yourself this month. Celebrate your victories, your failures, your milestones, as all these things have made you the successful woman you are today. Yay to us women!
One of the many things that contributes to making me a total fierce boss babe is my makeup. You know it got to be on point, especially my winged liner! I like my wing liner to be as sharp as my image, and for those of you who personally know me, it's pretty sharp! But when you are a boss babe on the run like myself, perfecting a wing is not necessarily something you have all the time for because we've all come to know that time is a valuable thing. So today I will be sharing some secrets with you on how I perfect my wing.
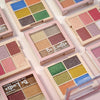
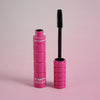
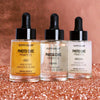
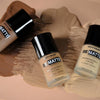
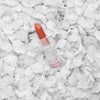
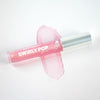
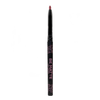
All you will need to perfect your wing with me is the Liquid Bold Liner in your choice of color, the Photo Chic Smudge Brush, and the original Primer Oil.
Now that you have chosen your eyeliner, face the tip of the applicator downwards, and vertically towards your nose. Begin to apply by placing the tip of the applicator onto the inner corner of your eyes.
From there, lightly line the top of your lash line across the eye until you have reached the outer corner of the eye.
Now that you have lined your lash line, face the tip of the applicator at a vertical angle on the outer corner of your eye, start by pointing the tip of the applicator at the end of the corner of your eye and lightly stroke the brush in an outward motion. You can determine how long or short you want the wing. I normally opt to starting it off with a small wing and gradually build it from there. Don't worry if this line is messy or crooked because you can totally fix that later.
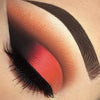
Close the eye you are winging, and keep the other open, in my case, I'm closing my right eye. Place the tip of the applicator where your wing line ends. Lightly stroke the brush in an upwards direction towards your eye, and connect the wing to your lash line. You are now a master at winging your liner! Just kidding, its not the end just yet. So this is the nerve wrecking part where most of us want to fix our wing and end up making it worse, rarely better, so we just give up, rub it off, and start all over. If you are like me and need to see visuals and not written directions, don't fear, I've got you! Reference to the photo grid above to see the application in images.
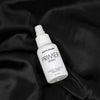
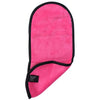
Don't wipe off that wing just yet, instead bust out you Original Primer Oil and the Photo Chic Smudge brush. You may want to use your Makeup remover cloth as well or just a regular hand towel as you will need one to wipe off any excess oil from your brush. Grab your Photo Chic Smudge brush, and add one drop of the Original Primer oil to the brush. Lightly dab the sides of the brush onto your towel to remove any excess oil. Then place the ends of the brush at the inner corner of your eye, right under you wing and lightly stroke underneath the wing outwards. This will allow you to clean up your wing. Dab your brush onto the towel again to clean it off and repeat the step until you have created the wing you desire. I have found that this helps me perfect my wing much faster without having to remove and start all over.
There you have it babes, some secret tips to perfect your liner! Make sure you share these tips with your friends because remember what I say, good friends share secrets! Until next time #CITYFAM.
Xoxoxo,
Melissa Martinez